
Web Performance Testing with Visual Studio Ultimate 2013
Part 3 – Data-Driven Tests and Custom Testing Objects
Note: The code used below can be found on GitHub at https://github.com/kevin-tuttle/Contoso-FAS-Testing
Data-Driven Tests
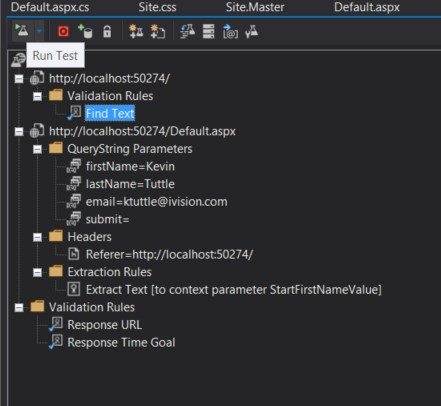
In part two, I showed how to add Extraction and Validation Rules to add some interactivity to the web tests, rather than simply doing requests. The data used to execute the rules was all hardcoded and not particularly flexible. As a refresher, here is what the final version of the Web Test looked like:
This would be useful for simple bulk requests where the data being posted does not really matter. However, there may be times when you want to have different post data on a per-request basis. You could just clone the request and hardcode each one with a different data set, but besides taking up a lot of unnecessary time, the data change again it would be difficult to update it again. Fortunately, Visual Studio has the functionality to add a data source that can then be used to populate any of the values in the test.
The first step is to add a new Data Connection in the Server Explorer:
I have a local SQL Express instance set up for this purpose:
Once that has been setup, I go back to the Web Test and pick one of the parameters to make dynamic. From the Value property, I click the down arrow and add a new Data Source from the new connection:
Notice that there are three options here for assigning a source: a database, a CSV file, and an XML file. If all of the data is in a flat file, you can skip the previous step in building a data connection and come straight here.
When I first began the development I started out with a CSV file, but it was not flexible enough for my purposes so I switched to a database. I will go over the reasons for that in a later blog post when I discuss handling multiple testing agents and how to keep them all in sync.
After selecting the connection previously added, you will see a list of tables on that database and be able to choose which ones you want to make available for the tests. I just have the User table on there currently so I add that one:
The Data Source is now be listed below the requests and can be modified from here:
Going back to the Query String Parameter properties, I can now select a column from the User table and map that to the parameter’s value:


Now that this is set, the next time the rule is run it grabs a row out of the table and use that to populate the query string value. The row that is chosen depends upon the properties of the data source. The property Access Method allows you to control how the selection works:
- Sequential chooses the rows, in order, starting with the first row and then looping back to first after all the rows are used.
- Random chooses a row from the table at random – regardless of previous row choices. So this can result in some rows being repeated and others not being used, particularly in shorter test runs that aren’t long enough to statistically even out. The alternative is…
- Unique essentially shuffles the table and then iterates through those. So it is similar to random in that it uses a random order, but each row is chosen exactly once before starting over. In my experience, this gives the most reliable results in that you can ensure particular datasets are used, and you can use duplicate rows to introduce weighting to them.
- Do Not Move Cursor Automatically doesn’t choose a new row at all. It uses the first row in the table and stay there for any subsequent requests. You probably do not want to use this option by itself as it makes the data binding not much more useful than hardcoding the information. Where this is useful is when you have some custom code doing the row advancement for you. This is what I’ll review next.
Custom Web Requests
In the last blog post, Web Performance Testing with Visual Studio Ultimate Part 2, I ended with showing the Coded version of the test that was built using the wizard. It allowed for greater flexibility and customization of the test execution, but left something to be desired in its code style.
Here is what a basic request looks like – it builds the URL, adds the query string, sets some default values, and then attaches three extraction rules which have their own long list of default values:
We need a custom class or two that handles all of the defaults and most common cases so the code can be more functional:
With these classes in place, we can do the same functionality in the main code just by calling this:
One of the most common things that I found being called, in stress-testing an intranet site, was the login process. The site was setup to do straight Windows authentication through their Active Directory services, but for our testing purposes, a web service was setup that took a username and password as a post and then returned a token. Every time the system tested a particular function of the application, the first step was to login.
We could use the above custom request objects (ignoring, for the moment, the actual posting of the data) to do the login and store the token in the Context dictionary:
Note here that the result from the request is a simple JSON string in the format: {“Token”:”value”} so this request would call the URL, and then run the Extraction Rule to take the result and then store it into Context[“LoginToken”] for use later.
Now, while the custom classes are definitely a time-saver, and a much cleaner approach, it’s still not a practical solution when there are thousands of such requests to manage. Additionally, when stress testing, if the request is something like “Simulate a Login” or “Submit a Note”, then that may require multiple requests, every single time it’s done. And those may be included in dozens of different testing scenarios. There’s also no reason the same request should be defined, exactly the same, multiple times in different places. The solution to this is to abstract even further.
Custom Test Functions
Here I’m defining a “Function” as a logical grouping of requests. So the “Simulate a Login” function may involve:
- Opening the application’s home page (home.aspx)
- Opening the login page (login.aspx)
- Posting the login information to a form
- Extracting the result and storing it in a Context variable
- Opening the application’s main application page (appmain.aspx) and adding the token to the query string
I haven’t added posting functionality to the TestRequest yet, but it’s definitely going to be needed for the rest of the processes. The login above, for example, will need the username and password passed to the service. Here’s an updated version that supports a (JSON-formatted) POST string. I’ve also added some additional constructors to clean things up and make it easier for a variety of different request types:
Using the new class, and adding the additional requests, it would look something like this:
This is much cleaner than what Visual Studio would have outputted for a similar series of requests, and easier to understand what’s going on just by glancing at the code. Note also the double-braces in the last request. As you might have guessed it’s a syntactic shorthand for a key on the Context dictionary that automatically populates the corresponding value.
Of course, now that this is defined, it should really be broken out into its own “object” so that we don’t have to add these lines to the beginning of every series of requests that requires a login. There are a number of ways to go about this: I could simply declare a class for each Function and then call something on that class to return an IEnumerable<TestRequest>. But there’s really no reason it needs to be an entire class when, ultimately, this is all just data – commands, yes, but still just data.
Database-Driven Test Functions
Now we’re talking! By putting the requests in the database, it’s much easier to change than just having them in the code itself. This also lets us positively link specific requests with performance metrics to be measured during the load testing itself. Now we just need the Function abstraction:
I’ll add in a corresponding class in the project:
And now, the main function of FormTestCoded is just this:
That same function can be called whenever a login is needed, there’s no unnecessary code duplication, and changes are as easy as a quick update to the database. Abstracting the entire thing and then putting the data where it belongs – in a database – will really help to get a handle on the huge number of requests that will be necessary for the load testing. You may be looking at the code there and thinking that we could abstract it even further, and you’re right: we have four more layers to go! I’ll cover all of those in detail in the next blog post. Once those are in place, we’ll finally be ready to start the actual load testing and data gathering phase of the project.