
Web Performance Testing with Visual Studio Ultimate 2013
Part 1 – Introduction and Creating a WebTest using Microsoft Web Test Recorder
Summary
Recently, ivision was contracted by a long-term client to conduct performance testing on an intranet application they had acquired from a third-party. The process involved coordinating and integrating technologies such as Microsoft Visual Studio’s Web Performance Testing and Load Testing, Microsoft SQL Server’s SQL Profiler tool, Performance Monitor, and Microsoft Excel. Our client wanted to ensure that the product would respond well while under expected (and greater-than-expected) loads using existing hardware. They could then determine if additional hardware was required before rolling out to the general users.
Throughout the testing process, we identified several issues with the application that were patched by the third-party. We also determined that the application would benefit from some increased hardware specifications and assisted in the recommendation process. The end result was a greater than 20x increase in application performance and peace of mind that the application would perform with the new hardware configurations.
The Client
“Contoso Automotive”
The Product
“Finance Approval System (FAS)”
Application
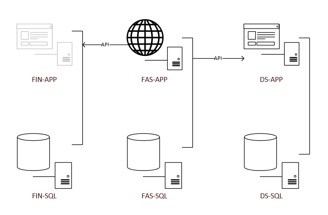
The site itself is an ASP.NET site, built using traditional Web Forms. All page requests are handled by making calls to a web service running on the same server. That layer connected to a Microsoft SQL Server setup on a separate server. On the back end, the FAS site connects to a third-party tool (Burdell Financial Services) that provides for analysis and tracking of financing requests. Additionally, the application interacts with a client tool that allows for management and versioning of uploaded documents and connects to a server application (DocStore) which uses both an application and MS SQL server.
Challenge
Contoso Automotive wanted to make the Financial Approval System available for client use throughout its many locations around the world. The application must be responsive regardless of the client’s geographic location and be able to handle up to 200 simultaneous users while maintaining acceptable performance.
Servers
The application used, or accessed, six different servers, though we only monitored five of them. The three layers involved were (1) the intranet site itself, the FAS servers, (2) the Burdell system, the FIN servers, and (3) the DocStore (DS) servers. The connections in both instances are via proprietary API connections created by the application providers themselves.
Setting up the web test environment
Note: while the Web Performance Tests can be run in any version of Visual Studio 2013, to use the Load Testing feature requires the Ultimate version.
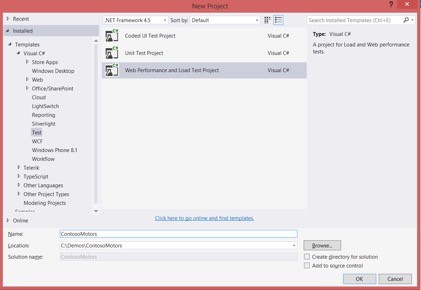
Step 1: Create a new Web Performance and Load Test Project
Open the Test folder under C#. The sample code here will be in C# but the overall concepts are the same. Note, again, that if you don’t have the Ultimate version that this folder will only have the first two items in it.
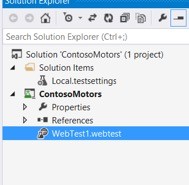
The new project includes a blank WebTest:
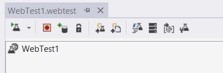
From here, without knowing anything about building a “coded” version from scratch, the simplest way to get started is going to be the Add Recording feature so we can click on the red button indicated below.
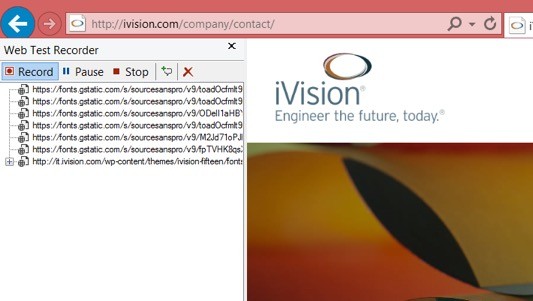
This launches Internet Explorer with an add-on called Microsoft Web Test Recorder. If you’ve used tools like Fiddler then this will be familiar. The add-on monitors all HTTP traffic that takes place within that browser session and records it. You can see them on the left below. There will be many that you’re not interested in, such as the font requests. You’ll have an opportunity later to remove those. Note, however, that if you want to exactly simulate the load time of the page, you may want to leave those in.
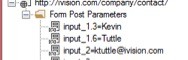
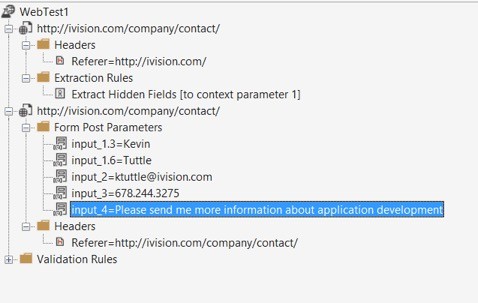
As an example of how the form post requests are logged, here is what it would look like when submitting a request to the Contact Form on the ivision.com website. You can see the request and parameters below.
Now that that’s done, we’ll hit the Stop button. Note that we could have clicked Pause if, for whatever reason, we wanted to only log part of the process. Once it’s stopped it closes the browser and begins generating the Web Requests automatically. While that is being done it displays a dialog like this:
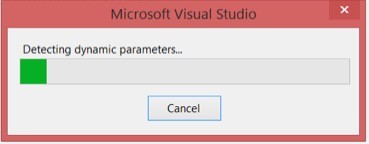
The goal of that process is to find parameters that are likely to change during different tests so that they can be resolved to variables that can be manipulated and used for rules in the process itself. In this instance Visual Studio doesn’t find any, but we can always promote them manually later. Here is the end result of the process:
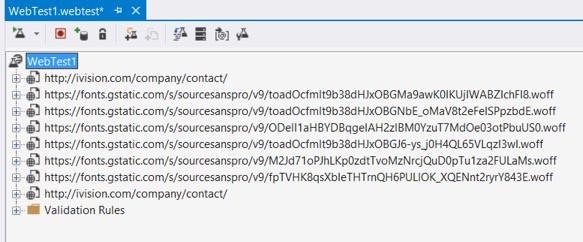
Again, for this test we are only really interested in the page load and then the form post so we can delete the font requests for now.
And that’s the basic WebTest all setup. It can be executed like any other test via Visual Studio and can even be combined with Unit Tests within Load Tests. This format is useful for quick tests and can be customized to include other operations such as:
- Extracting data passed back from the web server and storing it in variables for user later
- Abstracting the form post values so that they can be procedurally added at run-time from a given list of possible data sets
- Add validation rules that allow the test to pass/fail based on criteria including the URL returned and the time it takes to return a response
Even the flow itself can be managed by setting criteria that then chooses which request to run next. It’s possible, for example, to repeat a request until a certain response is given, or to switch to a different set of requests based on how much time it takes to respond to the previous request.
Microsoft has an excellent series of walkthroughs (for 2012 Ultimate) that demonstrate how to use this GUI wizard-like interface for creating and using Web Performance Tests. You can see it here: https://msdn.microsoft.com/en-us/library/vstudio/aa337591(v=vs.110).aspx
This way of doing it gives a great amount of flexibility in setting up the WebTest, all within the confines an easy-to-use interface. For real flexibility, however, the WebTest can be converted to a Coded Web Test in which the underlying C# code that the test generates is exposed and can be manually edited. Part 2 will cover what this code looks like and how it manages extractions and program flow.